Before diving into this article, please read Gun Cleaning 101 first. That article will give you the necessary background for this one.
Disclaimer: I would simply hate it if someone read this page and died of a misprint, but please do note the disclaimer at the bottom of the page. This tutorial assumes that you are an adult, that you are going to read and heed the instruction in the Owner’s Manual that came with your firearm, and that you are going to read and carefully follow the directions on each and every bottle of gun-scrubbing goop you pick up. If you don’t, and come down with a nasty case of the creepy crud, please don’t blame it on me. Follow the instructions on the bottle, wear the safety gear even though it feels silly, and if you have any doubts about your ability to do this safely, find a knowledgeable person to walk you through the process personally.
Safety First!
The first step to cleaning a Glock, or any other firearm, is to make sure the firearm is unloaded, and remove all ammunition from the room.
To unload the Glock, first remove the magazine from the butt of the gun. Then rack the slide two or three times to eject anything that may have been hiding in the chamber.
Once you believe the gun is unloaded, lock the slide open. Check by sight and feel to make sure it is unloaded, using your fingers as well as your eyes to make certain all is well. Touch the chamber with your pinkie finger to be certain there is an empty hole rather than a loaded round in there. Touch the inside of the magazine well to double-check that you remembered to remove the magazine before you racked the slide.
When you are certain the gun is unloaded, get all the ammunition out of the room. It is not enough to simply put the ammunition to one side, or even across the room from where you are working, because human beings make mistakes. Reloading the gun “by habit,” without really intending to, is one of the more common mistakes made by people who are comfortable around firearms. It leads to a certain number of accidental shootings every single year. Get the ammunition entirely out of the room so that it would require a very deliberate, conscious effort on your part to get the ammunition back together with the gun.
Once the ammunition has been removed from the room, check again to be sure the gun is still unloaded. This is necessary because the gun has been out of your hands. Build a lifetime habit of checking that a gun is unloaded every time you pick one up or set it down. This can do no harm, and may save you from embarrassment or outright grief later on.
Disassembling a Glock
| First, check that the chamber is empty. Do this even if you followed all the steps above and “know” it is empty. There is a good reason to be obsessive about this: you must pull the trigger in order to disassemble your Glock. It would be highly embarrassing to put a hole in your safe backstop if you didn’t have to! |
|
| Next, find a safe backstop. If you are on the ground floor, you may consider the floor as a safe backstop for this step. If you live in an apartment, you may have to build a safe backstop for yourself (this isn’t as hard as it sounds; see the article about Safe Backstops for ideas). In no case will you try to disassemble your Glock without having a safe backstop, because that would involve multiple violations of the Four Rules.
Gently lower the slide on an empty chamber and, with the gun aimed at your safe backstop, pull the trigger. (Do not put any body parts in front of the muzzle while pulling the trigger!) |
| Now, locate the takedown lever. You will find it on the frame, just above the trigger. In a moment, you are going to be pulling that lever down, toward the trigger guard. But first, you’re going to learn a new grip: the “gunsmith’s hold.” |
|
| A gunsmith’s hold will allow you to easily hold the slide just slightly retracted, which is what you are going to need to do in order to pull that little takedown lever and remove the slide from the gun. It is a very sneaky way of pulling the slide back with one hand, making it easy to do other things with your free hand. And it also prevents you from doing silly things like pointing the gun at yourself while you try to figure out how to pull the slide back “just a little.” |
|
- Step one: put the web of your hand on the back of the gun.
- Step two: bring your fingers over the top of the gun and touch your thumb.
- Step three: tighten your grip to bring the slide to the rear.
|
|
| With the gun held in a gunsmith’s hold, pull down on the takedown lever. As you do so, you will feel the tension on the slide loosen up. This is normal. In fact, it is what you wanted to happen. You may have to pull the slide slightly more to the rear in order to release the tension as you pull down on the takedown lever. That’s okay, too. |
|
| Gently remove the slide. I like to flip the gun over on this step, as the picture shows. Turning the gun over isn’t strictly necessary; it’s just my paranoid way of keeping everything together until I’m ready for it to come apart. |
|
If the slide does not easily come off the gun at this point, you need to back up and make sure that:
- The trigger was pulled before you began.
- The takedown lever was pulled all the way down, not just partway.
- The slide was partially pulled back while you pulled down on the takedown lever.
Whatever else you do, do not force the slide off the frame. If you’ve done it right, the slide will come off easily. If you force it, you could break something. |
|
| Set the frame aside. We’ll come back to it later.
Remove the recoil spring from the slide. You may have to pinch it a bit, but don’t be afraid of breaking it. It’s sturdy enough to withstand some man-handling. |
|
| Set the recoil spring aside.
Remove the barrel. You’ll find it just underneath where the recoil spring had been before you removed it. If you have trouble lifting it out, tip the slide over and let it drop out. Won’t hurt anything. |
|
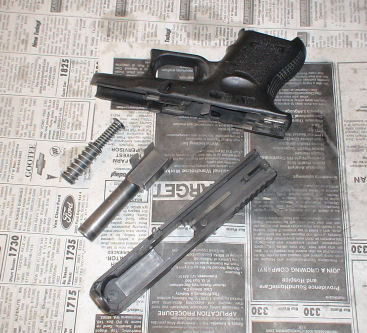
| Congratulations! Your Glock is now disassembled for cleaning. Although it is possible to disassemble it still further, that’s really a job for a once-a-year visit to the gunsmith. This is all you need to do for a basic cleaning. |
|
Cleaning a Glock
Now that you have the gun disassembled, it is time to clean it. I hope you followed all the suggestions in Gun Cleaning 101 and have your cleaning tools all ready to go.
| This is the cleaning rod. All of your accessories will attach to the end of it. |
|
| Attach your patch holder to the end of the rod. It should just screw right on. |
|
| Put a patch into the patch holder. |
|
| Pull the patch through the patch holder … |
|
| … so that it is evenly centered on both sides of the holder. |
|
| As long as your rod is clean, it is okay to dunk your patch into the solvent. |
|
| Once the rod gets dirty, it’s a better idea to get your patches wet by hand, so you don’t contaminate the solvent with icky dirty gun stuff. |
|
| If wetting patches by hand doesn’t appeal to you, you can always wipe the gunk off your rod before using it to dunk your patch. |
|
| Now it is time to get the inside of the barrel (the bore) wet. It needs to soak awhile, so the solvent can do its thing. Run the wet patch into the barrel from the non-muzzle end (the breech end, the end with the feed ramp attached to it). |
|
| Run the wet patch all the way through the barrel, so that it comes out the muzzle end. Do this a couple of times, making sure the entire barrel is nice and wet. Then set the barrel down with the wet patch still inside it somewhere. (Yup, still attached to the rod. You won’t need it for a bit.) |
|
| While the bore is soaking, get another patch (or your cleaning rag) wet, and wipe down the rest of the gun. Starting with the slide, wipe away all visible fouling. |
|
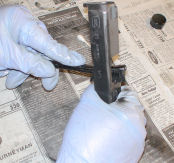
| Once you’ve gotten rid of the larger areas of fouling, you can start on detail work. It’s easiest to clean the nooks and crannies with a solvent-dampened pipe cleaner. (Again, remember not to dunk anything dirty into your solvent bottle.) If you don’t have pipe cleaners, a stiff nylon toothbrush will reach many of the same areas. |
|
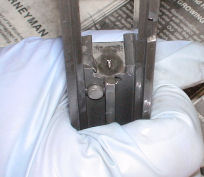
| As you are cleaning the slide, pay special attention to the breechface, which tends to get really dirty (ugh!). |
|
| The breechface should be vigorously scrubbed with a solvent-dampened nylon brush until all the fouling is removed. |
|
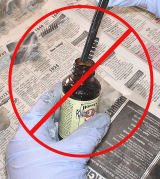
| Did I mention you should never, ever dunk anything dirty into your solvent bottle? That goes triple for brushes! |
|
| Wipe the recoil spring with a solvent-wet patch. Be sure to get the areas behind the spring itself as well as you can. Scrub it with the nylon brush if necessary. |
|
| Now it’s time to tackle that disgustingly dirty frame. Give it the same treatment. Wipe down external fouling … |
|
| … and then scrub detailed areas with smaller tools such as pipe cleaners, toothpicks, or nylon brushes. |
|
| Near the front and back end of the frame, on either side, you will find short stretches of metal. These are the rails. Detail clean under each of the four rails. |
|
| Remember to keep everything nice and wet with solvent so you don’t have to work so hard. Sometimes I like to just shove a wet patch in there and let it soak awhile, because I’m lazy and the solvent can do the work better than I can anyway. |
|
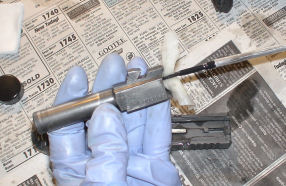
| Now it is finally time to pay some attention to that barrel. You may want to move outside for this part of the job, because it’s going to get messy. (Make sure you are wearing your safety goggles, too.) Check that the barrel is still wet (run another patch through it if you’re uncertain) and then begin scrubbing the barrel with your brass bore brush.
Important: never use a brass brush on a dry bore. Otherwise you could scratch it or wear it out prematurely. Always brush from the non-muzzle end toward the muzzle end when possible; this is because the metal rod can put accuracy-damaging scratches around the crown (the muzzle end of the bore) if you get too enthusiastic. |
|
| Push the brush completely through the bore on each stroke, so that the brush comes out the muzzle end each time. If you try to pull the brush back too soon, before it has exited the other end of the barrel, it will get stuck. |
|
| Bore brushes are stiff by nature. Don’t be afraid to shove hard if you need to do so. Just keep the rod straight at all times. |
|
| After you have scrubbed the bore with the bore brush a couple of times, run a wet patch through the bore. You’ll be surprised how dirty it gets. |
|
| Continue to alternate brush-scrubbing with patch-wiping. When you think the bore is finally clean enough, run a dry patch through it to check if it really is. The bore is clean when a dry patch comes out clean.
To answer the inevitable question that pops up at this stage, no, the patch does not have to be perfectly clean. “Mostly clean” is good enough. |
|
| Wipe down the outside of the barrel, paying special attention to the feedramp at the non-muzzle end. |
|
| Use the nylon scrub brush if you need to. |
|
| There’s no real reason for this picture — I just liked the look of the sparkling-clean feedramp. |
|
| Once it is clean, dry the inside and the outside of the barrel. |
|
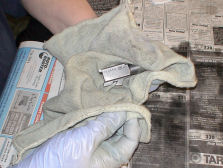
| Wipe down and dry the frame and the slide, too. Get all the leftover solvent out if you can. |
|
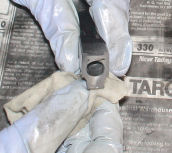
| On the underside of the slide, you will find a hole. This hole must be clear, clean, and DRY in order for the striker (firing pin) to work properly. Do not allow any oil to find its way into this hole, and if you spot junk in there, dig it out with a toothpick (or blow it out with a can of compressed air). |
|
Lubricating the Glock
We’re almost done, and the hard part is definitely over. Now that everything is clean and all of the solvent has been wiped dry, it is time to lubricate your Glock.
Glocks do not like to be too wet or oily. When the instructions below tell you to “put a single drop of oil” someplace, that is exactly what you should do. Putting too much oil on, or putting oil in places that should not be oiled, is probably the number-one cause of malfunctions in Glock pistols.
There are a few spots where a small drop of grease might be preferable to gun oil; I’ve noted those in the text. But oil will do just fine, as long as you are conservative in applying it. (Did I mention that Glocks don’t like to be too wet?) I am partial to both white lithium grease and to Tetra Gun Grease, which is a synthetic lubricant.
| Put one or (at most) two drops of oil inside each of the grooves that run along the inside edges of the slide. Put these drops at the back end of the slide rather than somewhere in the middle. |
|
| As soon as you’ve put a drop of oil on each of the two grooves, balance the slide on the muzzle end and leave it there while you work on other stuff. The oil you just put at the back end will drizzle down and puddle at the nose end; that’s what it is supposed to do. (If there’s not enough to puddle, good!) |
|
| Pick up the frame and put one drop of oil on each of the four rails on the frame. If you have grease, this is an acceptable place to put a tiny bead of grease instead. |
|
| Locate the weird little crookneck-looking piece of metal at the back of the frame. Put one drop of oil up underneath it — and again, this is an acceptable place to put a small bead of grease instead. |
|
| Put a very thin coat of oil on the outside of the barrel. The inside of the barrel should stay dry. The outside of the barrel can take a single drop of oil, smeared around with just your gloved finger, or you can put a couple drops on one of your clean patches.
I like to take the same slightly-oiled patch and wipe down the outside of the slide at the same time. It isn’t strictly necessary, but it looks a little prettier. |
|
Whoops, almost forgot! Pick that slide back up, if you haven’t already, and wipe away any excess oil at the muzzle end.
Reassembling the Glock
With the Glock clean, dried, and then lubricated, it is time to put it back together again. Don’t be worried about this step; it is far simpler than many beginners fear.
| Return the barrel to its spot in the slide. There’s really only one way it can go in. Jiggle it a little if it doesn’t want to drop into place. |
|
| Put the recoil spring back in. You’ll have to compress it just a tiny bit to get it to fit. Don’t let that throw you off. |
|
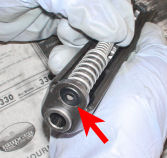
| The front of the slide has two holes. The larger of these two holes contains the muzzle end of the barrel. The recoil spring should be snugged into the other hole, with the larger end of the spring toward the front of the slide. |
|
| The back end of the spring has a flat end. It is getting snugged into the half-moon shaped piece of metal attached to the barrel. Be sure that the spring fits firmly within this spot, leaving no extra space at the bottom of the ‘moon.’ |
|
| Guide the slide back onto the frame, taking care to keep the rails lined up as you do so. |
|
| Pay special attention to the alignment as the slide reaches the rear rails. It is surprisingly easy to miss catching the rear rails. |
|
| Don’t do this! Allowing the slide to come in above the rails rather than on the rails is a nasty little problem to fix. |
|
| With the gun pointed at a safe backstop, pull the slide all the way to the rear and rack it a few times to make sure all the oil/grease is spread around to where it needs to be. Continue to keep the gun pointed in a safe direction, and pull the trigger (dry fire) a few times to make sure everything is functioning properly. If anything feels at all funky or weird to you, find a gunsmith or another knowledgeable person to help you diagnose the problem. |
|
YOU’RE DONE!
Give your pistol a final wipe-down with a nice, clean cloth and you’re all finished.


